Friday, March 9, 2012

Finally back!

Whew! Finally back! I kept meaning to get back to my blog, but life happened :)
The past 13 months have been busy....full steam ahead busy! We painted and moved into the foreclosure we bought.
I'd love to say we have accomplished all the projects that need to be done, but that would be a big ole lie! We are still making progress.....slow progress! We have light fixtures now (they were all missing!) and we painted a good portion of the house. The colors before we moved in were interesting....

We also had the house we were moving out of painted and prepped for the market. Loved our little house! I picked out everything for that house, and for the previous 4 years it was our home. It was our first house after leaving the military, and was the only HOME by baby (who is 6 now, so not really a baby...) even remembered. It has a million dollar view, great neighbors, and lots of good memories in that home. I was going to be sad to see it go.......
Unfortunately, the market was flat and it didn't sell. So now we are accidental landlords and already on our second tenant! I think we have great tenants now, and am actually a little glad our first renters totally bailed on us. I still wish it would have sold, but we are making lemonade with the lemons!

Last year was a hard one personally for our family. We lost my grandfather, learned exactly what family means to each other as we supported each other through the trials that we all face in life, and I believe strengthened relationships we may have forgotten or taken for granted.
In the above picture, my Grandmother is being presented with the American flag. I am sad to say that just two weeks ago today, we also lost Grandma, just 10 short months after Grandpa's passing.
Above is my dad and Grandma shortly after my Grandfather's funeral. I have learned a lot by seeing the love, service, and care my dad has given to both of my Grandparents in the last years of their lives. They had no doubt that they were loved and that they left behind a legacy in their children.
Here are a few photographs from happier days! Kayleigh and my Grandfather (and Sophie-our very spoiled dog) at my parents home visiting. Grandpa lived just down the street from my parents. Every school day when i was a girl about Kayleigh's age, I would see him walking to the gas station to get his newspaper. He was the one the school would call (if they couldn't get our mom) to pick us up when we had tummy aches or bumps and bruises. You could count on a little Debbie and a soda while you waited for mom to come take us home. He had an amazing yard and an even more amazing garden. And I think he had a way about him that EVERY one of his grand kids believed they were his absolute favorite! (though I know I really was!)
And here is my immediate family at my "little" brother's wedding a few years back. What a crowd! Most of the young men in this picture are now about a foot or so taller!
Family is so important! Grandma made an effort to be at our special days. Baby blessings, baptisms, weddings, dance recitals, etc. As we were reminiscing after Grandma's funeral, we recalled the traditional birthday dinner Grandma would treat each of her grand kids. It was a one on one dinner, and we got to pick the place! For a kid from a large family, that was like gold! Grandma also worked at a bank and would include a special coin and a two dollar bill in our birthday cards. I have a collection of coins and bills that remind me of her and my history each time I see them. I also have outfits she made for my babies to be blessed in that I will cherish and pass on to my kids.
Losing almost a whole generation of my family within a year has made me pause and realize how fragile life is, how important history, memories and records are. This is one of the reasons I have dusted off the blog.
Many good things happened this past year too! My daughter crossed into her teen years (Yes, that is a good thing!), our oldest son got his driver's permit and made all-star soccer, our 9yr old made all-star baseball, our 8 year old got baptized and our "baby" started kindergarten. My husband and I celebrated another year (we are almost to 17 years now!!!) of wedded bliss.
Life is continually moving forward and changing, and now that I'm back, I hope to record a bit of it here along with some crafty fun! :)

Saturday, January 8, 2011

Upcoming projects...

First up today, I need your advice! :) This is the entry from the back door at the home we are in the process of buying. I was thrilled when I walked in the door and saw this! We have 4 kids in school, so it works perfect! They will each have a place for their book bags, coats, etc. The mural is not my style, so I would like to spiff this up pretty quickly when we close. I have visions of molding, bead board and paint.......

Here is my dilemma: I want to paint it, but what color? I don't want it to be the same blah color as the walls. (The next picture below shows the current wall color in the kitchen-it will be changing- which is visible from the entry area.) Any suggestions on how to paint this up?
Here are my current thoughts on what I MIGHT do:
White-this one is where I am leaning right now. It will brighten the area, and flow with the moldings through the house since they are white. I am concerned it will get dirty and dingy quickly. If I paint the framework white, should I paint the back wall a different color to make it pop?(In the bottom I plan to use black or dark brown baskets)
Black-the surround over the cook top is black, and since this area is visible from the kitchen it would also work ok. The entry area is about 4-5 feet wide, and does not have a lot of natural light. The floors are already dark. Painting it black would darken the space considerably. (For the bottom i will use either vintage locker baskets in coated white or canvas baskets.)
Blue-I LOVE blue and would probably use a color similar to what i have used on other projects. My kids may protest b/c until we have the kitchen painted a color other than orange, it would resemble Auburn colors and we are a decidedly Crimson Tide family. :)
Seriously though, I am worried I will tire of the blue quickly, but it would be fun until I got tired of it. If I do the blue, the baskets for the bottom will be either a deep brown or the vintage locker baskets I have that are coated white metal.

Those are the three colors I am chewing over right now.
The kitchen is also a project....you can see in the above pictures that the walls are a glowingly bright orange. This color is carried from the kitchen into the dining area and into the attached hearth room. The ceilings are also this lovely shade of pumpkin. The floors in here are wood. The cabinets are distressed/glazed cream. The look fine except the clear coat is yellowing considerably. The counter tops are granite tile. I am considering painting the bottom cabinets black to match the cook-top surround. Not sure about the upper cabinets.I was thinking of leaving them a lighter color? Thoughts????? Seriously, I want to hear your opinions!
Is it sad that I had a dream about that tub last night? I am quite certain I will be soaking in it our first night in the house if all goes well!
And now, this is what I am working on today:
I've only had it on my list for like 4 months (maybe longer, but denial is a wonderful thing). I am sanding now! I got this desk for 7.50. The drawers are in need of repair, so they are in the garage getting some first-aid.
Check back Monday for the finished results! :) And don't forget to leave me a comment with your opinion on the paint dilemma!

Tuesday, January 4, 2011

New Year, New Projects, New Posts!

Happy New Year! I am blowing the dust off the blog and have a lot of fun projects planned!
I had hoped to keep posting through the holidays, but we were so busy, I had no time. Here are a few of the fun orders I had over the holidays.
We took old cabinet doors and made stocking/picture hangers. They looked so good! I was tempted to make one for my home, but ran out of time and cabinet doors.
Teacher's gifts.......aren't these fun!
A nod to patriotism.
These next 2 smalls signs look great hanging on BIG wreaths! Or just as they are....

And another cabinet door.
The holiday season was a busy one! Fun and busy! Our vinyl business heats up from Sept. through Christmas, but now we will have a lull until about March..
This is good because......we are buying a house! It is a Bank Owned property and there are things to be done! Lots of fun things! :) The inspection is today, so as long as it passes inspection..this blog will be hopping with lots of projects for both homes!

Don't ya love the front door!!!! (That is my dad looking at the missing entry lamp....I am going to put him to work!)

Thursday, October 28, 2010

oh crap....my crate!

The holidays are getting closer, and the weather is finally cooling off! That means CRAFT FAIRS. We are always looking for ways to bring stable height to our display. Building a wall is not a feasable plan when our shows are usually outdoors. Wind is often a factor. I decided to try building a few things for the tables to give height. My criteria were: cheap, stable, not too heavy, and easy to transport. Sounds doable right?
My first attempt was to build a primitive step. (if you look at the pictures at the end, it is the blue object the crate sits upon).
I did not square anything up, and kind of threw it together. The end result is a leaning step with uneven boards. I am going to use it on my porch to house flower pots (b/c no one will see it that way). It was a total FAIL!!!!!!!!!!!!

My next attempt, I decided to search the blogs for inspiration. I found some wooden crates on Ana White's blog. I based this loosly on the crates she built.
We built a privacy fence and had to cut about 2 feet off the top of the boards. We kept all the chopped off pieces, thinking I could use them for something. They were perfect for this! I grabbed a couple furring strips at Home Depot and got to work.

I cut the fence scraps to 18 inches. I needed 2 of those. I cut the furring strips to 12 inches for the top and bottom. I used screws to attach the wood b/c we are going to be using these for heavy products.(Plus I really didnt want to hammer)
On the back, I used the furring strips and 3 sections of 1x3 also cut to 18 inches.
Once the crate was assembled it kind of looked like a crate (which is good because the step kind of looked like a bunch of boards haphazardly nailed together).
I cut our company name in vinyl and applied it to the side.
Painted over it then removed the vinyl stencil.
My next step is going to be sanding. The image is too dark for what I had in mind.
I love my little sander. Makes things go so quickly.
I sanded both sides. I am feeling pretty good about now.
Looks old and worn just how I wanted it. The wood was a little too bright and new looking. I decided to do something about that.........
BIG MISTAKE> Instead of just going straight for my antiquing glaze, I decided to try an old stain i had on hand.....dumb, dumb, dumb. I knew I had 3 different woods and they would take the stain differently. I did not, however, count on what would happen next.
Yikes!!!!!!!!!!!!!!!!!!!!!!!!!!! Can you say "hurry and get that off....."? Nope, because it was TOO late. The fence panel sucked the stain like a sponge. IT WOULD NOT WIPE OFF. The only thing getting this off was stripper or sandpaper. Argh......
So what did I do? I flipped it over and finished the other side. I made a thin wash with 2 parts water to 1 part antiquing glaze (I use the Valspar glaze). This is more of the effect I was going for.
(see the funky little blue step) Now the sad part is that the backside is still a hideous purple stain. The only think I am going to be able to do to save this to use on our display is either replace that piece of wood (not happening) or paint the crate (happening). So, tomorrow, I will be painting this black (or maybe blue?). I wish I had left that dang stain alone!!!!! I thought about pretending I hadn't done that, but I think part of the fun in sharing on the blog is sharing what went terribly wrong as well.
I really do like how the crate turned out. I would estimate it cost me a buck to make (all I had to buy was the furring strips). It is solid and will make a good riser on the booth. I have tons of wood left so I plan to make quite a few more of them. I am thinking on the next ones, I'll just leave the stain alone!
This was my other success of the day. I have a close full of "stacker " wood. Left over from the stacker craze of 2007. I hate letting something sit unused, so I took 4 of the small stacker pieces and then cut a scrap of 2x6 to match their height when stacked.
This would have looked great in my last kitchen! I'm still pretty happy with it, especially for a quick little craft that cost nothing out of pocket.

So does anyone else want to own up to making a big mistake on an project? I think I will be able to paint it and salvage my crate, but man did I learn to TEST the stain on a scrap piece first.

Sunday, October 24, 2010

Absentee blogger.....here is why!

I have been a bad blogger this past week or so. Life here has been hectic. No, crazy is a better description. But this is a fun crazy, hectic life! We had our first booth of the season this past weekend. The past few weeks have been a flurry of preparations, planning and making fun things.
I got this antique frame and made the above whiteboard. I LOVED IT. Then I broke the glass. :(
No time to get glass cut, so I made it into a memo board. It didn't sell, so now I am going to cut glass and remake the whiteboard.
We are having fun with burlap this season. The menu board above was popular. It is a fun idea for any kitchen!

My partner made the board above and below. I love them both!
We have brother/sister boards.
Several different hanging signs....
These are the hanging sentiment signs that people seem to LOVE!
Chunky picture frames, industrial but fun.

Another favorite. Reclaim your fridge....The kids love these and the moms do too.
The magnetic photo boards have always been one of our better sellers. It is so interesting how what is a hot-cake sometimes is a cold fish other times. This was a cold fish this week.
A new project we experimented with and we like.

And here is one of MY favorites. It is busy but I want it for my house! We make all these fun things for our booth, and seldom make things for our own houses! I do think I'll be making myself one of these.

This is just a little taste of what we had. I didn't get a chance to take pictures of the whole booth b/c we were busy ALL day. We had a great day. The weather was perfect, lots of friends came by to say hi, and we did brisk business all day. We have 2 weeks until our next show. We'll spend this time making all the custom orders from this past weekend and remaking the things that sold this past weekend. I have several projects here at home that are waiting for me. I LOVE this time of year! Getting to make fun things everyday makes me a happy mom!

Monday, October 11, 2010

End table Re-fab

Here is my latest rehab project. I picked this little end table up at the local Salvation Army for a few bucks. The drawer was missing and the paint job had seen better days.
I loved her lines and size, so I over looked the fact she was empty inside.
As I began my sanding, I discovered the green/gold color was some kind of treatment over white paint.
She has lots of gouges and scratches (and plenty of dirt too).
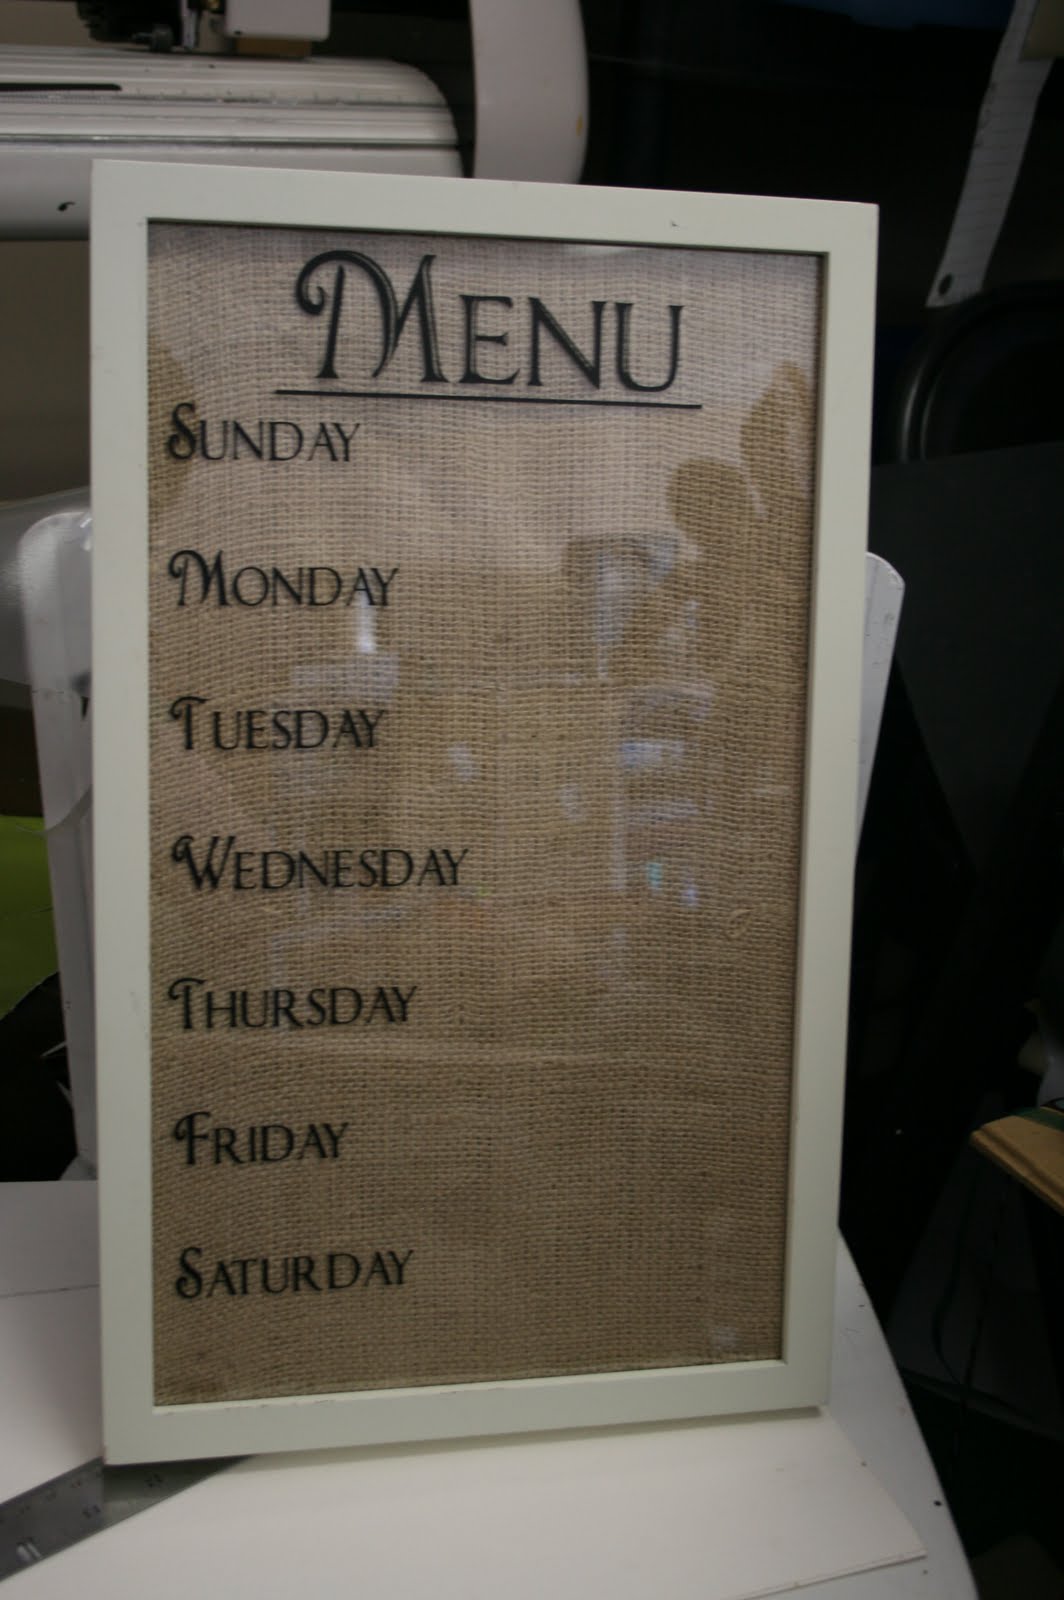
I sanded to the bare wood in some places and only till the shine was gone in others. I was trying to get rid of the chippy layer. I would learn this was a mistake when I went to spray paint.
Why is it a mistake? The paint takes differently to raw wood vs. painted wood. I was pretty ticked at myself b/c I have done enough furniture to know you either sand it all off, or at least evenly on the whole piece.
Here is an up close shot of how rough the edges were. It was not in great shape. I guess that is why I got lazy. I figured I didn't want to put a few hours worth of stripping and sanding into a $5.00 end table.
First coat of spray paint is on. (Of course, i used Krylon Blue Ocean-my favorite color ever!)
It was very uneven. Raw wood peeking through. Not good. I think I ended up doing like 4 coats.
Next I cut a piece of 1/2 inch MDF to make a bottom for my storage area. I then sprayed the inside white as a base coat.
I smeared the edge of the MDF with some construction adhesive to give the paint a barrier (otherwise the MDF would just soak it up). I thought about using some dollhouse molding, but I was trying to make this one quick! (hahahahaha....i worked on this in my spare time over 4 days vs. the 1 day I thought it would take)
I know the construction adhesive is a tacky solution, but honestly not every project is worthy of the time and energy the perfectionist in me wants to give. I knew this was going in my bedroom, and that the edge would be good enough.
Here it is painted. Not perfect, but it'll blend with the rest of the table's imperfections! In the picture above you can see I also painted the interior blue.
A few more coats of paint and I am happy with the coverage. It is smooth and even and nearly perfect. That means it is time to bust out the sander again.
There goes the paint job. Sometimes I hesitate before I start sanding b/c I love a nice, smooth, perfect paint job. However, I am a realist and anything in my house will get worn. I have 4 boys that make that a guarantee! At least this way it gets started on my terms.
So I sanded in the areas most likely to get bumped and battered. These happened to be the areas that were already pretty bumped and battered prior to the makeover.

Now comes the fun! My friend -Valspar Antiquing Glaze- and I got down and dirty!
I used a stiff paint brush to push the glaze into the groves and onto the edges.
I work on one side at a time. On larger pieces, I do small sections. This one was small enough I could do an entire side at one shot.
Here is a closeup to show you the groove I mentioned earlier. I left the glaze heavy in most areas of the groove.
Here she is finished and ready to go to her new home. I found a perfect sized basket at Michael's to hide my junk.
She is still pretty battered and worn. Only now she is beautiful too!
And now for her new home. I can't believe I am showing this next picture.
This is what I have been using for a nightstand. It is tiny (and not very pretty). Our bed is a king sized bed and we have high, boxed ceilings. The scale was all wrong. I also need to get something on our walls! We have lived here for 3 years, but I am scared to commit!
I am much happier with the end table as the nightstand. I need to make up the bed, work on the accessories and the wall, but this is definitely a step in the right direction. And certainly for a $5.00 investment, it couldn't get much better!
I like to give a side-by-side before and after.
So what do you think?